
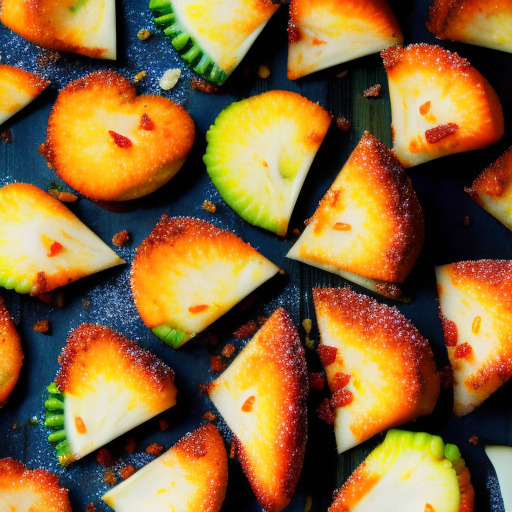
Sand Tart Recipe: How to Make the Perfect Holiday Treat
If you’re looking for a classic holiday treat with a unique texture, look no further than sand tarts. These light and crispy cookies have been a staple of Southern baking for generations, and their sandy texture and nutty flavor make them a hit every time. In this article, we’ll go over everything you need to know to make the perfect batch of sand tarts, from the basics of the recipe to some tips for making them just right.
Introduction: What are Sand Tarts?
Sand tarts are traditional, Southern-style cookies with a unique texture and taste. They have been enjoyed by families and communities for generations as part of holiday and special occasion tradition. Sand tarts get their name from their crumbly texture, which is similar to that of sand. Made with flour, butter, sugar, and vanilla extract, these lightly sweet cookies also often contain ground nuts like pecans or almonds. What sets sand tarts apart from other types of cookies is their delicate texture and nutty taste. It’s hard to describe the taste of a sand tart if you’ve never had one before - it’s not sweet enough to be considered a dessert in its own right but definitely isn’t savory either.
The History of Sand Tarts as a Traditional Southern Cookie
The origin of the sand tart cookie is unclear because there is no record documenting when or where they were originally created. However, the cookie has been in use in Southern kitchens for centuries as part of holiday traditions such as Christmas parties or family reunions.
What sets Sand Tarts Apart from Other Types of Cookies
The secret behind sand tarts lies in its texture; it is light and airy yet crispy at the same time, making it irresistibly delicious. This delicacy comes from the combination of flour, butter, and sugar base mixed with finely ground nuts to produce a sandy texture that melts in your mouth.
Some Common Variations on the Recipe
Sand tarts are versatile cookies that can be customized using a variety of techniques and ingredients. Here are three popular variations:
1. Cinnamon sand tarts
In this variation of the traditional recipe, cinnamon is added to the dry ingredients along with the ground nuts for an added flavor kick. The cinnamon also gives it some spice, which enhances the overall taste of the cookie.
2. Chocolate sand tarts
This variation starts from the original recipe but adds cocoa powder to the dry ingredients. The result is a deep chocolate flavor that combines with the nutty base for an incredible taste experience.
3. Almond sand tarts
Instead of using pecans, you can substitute almonds in this recipe. This creates a slightly different taste due to the unique flavor profile of almonds compared to pecans.
Ingredients and Equipment
To make sand tarts, you will need common baking ingredients such as flour, sugar, salt, and butter. In addition, you will need ground nuts such as pecans or almonds to give it its trademark sandy texture. You will also need a few tools such as measuring cups, mixing bowls, a hand mixer or stand-in mixer and parchment paper.
Ingredients:
- 2 cups all-purpose flour
- 1 cup unsalted butter
- 1/2 cup powder sugar
- 1/2 cup ground pecans (or any nut you prefer)
- 1/2 tsp salt
- 1 tsp vanilla extract
Equipment:
- Bowl
- Stand mixer or hand mixer
- Measuring cups and spoons
- Parchment paper
- Rolling pin
- Cookie cutters
Preparing Your Dough
Sand tart dough preparation is simple, but the right technique is necessary to achieve the perfect consistency and texture. Following these steps will help you achieve the best results.
Step 1: In a bowl or stand mixer, cream butter and powdered sugar together until it’s fluffy. This takes around 2 to 3 minutes.
Step 2: Add in vanilla extract. Beat in the egg yolks next and ensure they’re fully incorporated.
Step 3: In another bowl, mix together flour, ground pecans (or any nuts you prefer), salt with a spoon until they are well-combined.
Step 4: Gradually add dry ingredients to butter mixture; beat on low speed until a soft dough forms.
Key Tips for Getting the Right Consistency and Texture
When mixing your ingredients together, take care not to overmix. Overmixing can cause your cookies to be too dense rather than being light and crispy as desired.
Ensure that your eggs are fresh as this can affect how well they combine with the other ingredients. High-quality unsalted butter should also be used for the best taste.
It’s important to get the dough texture right. If it’s too crumbly, you may struggle to roll it out, so add a small amount of water if necessary. If the dough is too sticky, try adding extra flour slowly until you find the right consistency.
You may want to experiment with spice and flavoring additions like nutmeg or cinnamon for an elevated taste.
Rolling and Cutting Your Cookies
Once you have your dough prepared, you must roll it out and cut it into the shapes you desire. Get ready to make that quintessential sandy dough!
Step 1: Sprinkle some flour on your working surface to ease the rolling process.
Step 2: With a rolling pin, roll the dough out to about 1/8 inch in thickness.
Step 3: Use circular cookie cutters (diameter 2 inches) or any other shape of your choice to cut your cookies into shape.
Tips for Cutting Out Your Cookies Evenly and Efficiently
When using cookie cutters, press them down firmly and evenly, ensuring they get through your entire rolled-out dough. Try to space the shapes close together to avoid wastage of unused scraps of dough.
To save some time, buy pre-cut parchment paper sheets that match the size of your baking sheets, then cut them once more down the center lengthwise. When you take out your prepared cookies from the assembled dough board, slip this double-length paper under them and transfer them seven at a time onto a baking sheet.
Baking Your Sand Tarts
Now that your cookies are ready in their perfect little circles, it’s time to bake them!
Step 1: Preheat your oven to 350 °F (180°C) degrees
Step 2: Place parchment paper over an ungreased baking sheet. Place the cut cookie dough on top of it and bake for 12-15 minutes or until edges start browning.
Step 3:: Be sure not to overcook as this can cause them to be too crisp or dry. Baking time may vary from oven mileage and preference, but it generally takes 12-15 minutes to achieve the golden brown color.
Tips for Achieving a Consistent Color and Texture Across All Your Cookies
Because the sand tart cookie is prone to browning on the edges, you may need to turn your baking tray in the oven occasionally. This will ensure that they evenly cook and avoid any burnt spots.
Remove them from the oven when they just start getting a nice light golden color around their edges. Baking for too long can take away the cookie’s delicate structure and cause it to crumble or be too crispy.
Serving and Storing Your Sand Tarts
Now that your delicious sand tarts are done, it’s essential to handle them with care for maximum freshness. Here are some tips:
How to Serve Your Sand Tarts
Serve these cookies at room temperature only after they have cooled off completely. Pair them with tea, coffee, or as an accompaniment to your holiday dessert tray.
Storing Tips:
- Keep in an airtight container at room temperature.
- Avoid stacking the cookies as this can cause breakage.
- Do not store sand tarts in moist places, as this can make them lose their texture faster.
Ideas for Pairing Your Sand Tarts With Other Treats or Beverages
If you want to enhance your enjoyment of these cookies, try pairing them with drinks like eggnog, hot chocolate, and coffee. Or add them into your ice-cream bowl to add some crunchiness!
Troubleshooting Your Sand Tarts
As with most recipes, things can sometimes go wrong. Here are some common issues bakers may face when making sand tarts and how to fix them.
Cookies That Spread Too Much or Don’t Hold Their Shape
If your dough is too soft, your cookies may spread out too much while baking. Fix this by using colder butter instead of the room temperature one used before.
Dough That’s Too Dry or Too Sticky
If your batter is too dry, gradually add in more water to get the right consistency. On the other hand, if it’s too sticky, dust some flour on your surface and knead the dough again.
Cookies That Turn Out Too Tough Or Not Crispy Enough
If you find that the cookies after baking are tough, then you overcooked them properly. If they aren’t crispy enough, the oven temperature may not have been high enough.
Making Sand Tarts Your Own: Variations and Customizations
One of the best things about this dough is its versatility. Here are some ideas for customizing the recipe to create your variation:
1._Adding different types of nuts: Apart from pecans, you can experiment with different ground nuts like almonds or hazelnuts.
2._ Adding spice options: you can try experimenting with new flavors like cloves, ginger, or cardamom for a unique taste twist.
3._Fortify with chocolate: You can amp up richness and flavor with chocolate powder or chips for a choco-twist complimenting the nuttiness of the tart.
Conclusion: Share Your Sand Tart Success Stories!
Now that we’ve gone over everything from what Sand tarts are to how to bake them without any problems, it’s time to start baking! Don’t be intimidated by the recipe; it’s straightforward to follow and forgiving even if you’re a beginner. We hope this article has been helpful in guiding you through the process of making these deliciously unique southern-style cookies. Be sure to share your own experiences and successes in the comments below – happy baking!
Sand Tart Recipe: FAQs
What are sand tarts?
Sand tarts are a type of cookie that originated in Germany. These cookies are crispy, buttery, and simply delicious. They have a sandy texture due to the high ratio of flour to butter.
Are sand tarts difficult to make?
No, not at all! Sand tarts are simple to make, and you only need a few ingredients. Plus, they bake quickly, so you can enjoy them in no time.
What are the ingredients needed for sand tarts?
- Flour
- Sugar
- Butter
- Egg yolk
- Cinnamon (optional)
Do I need any special equipment to make sand tarts?
No, you don’t! All you need is a mixing bowl, spatula, and a baking sheet.
Can I customize my sand tart recipe?
Absolutely! You can add different flavors such as vanilla extract or lemon zest for added taste. You can also add toppings such as chopped nuts or sprinkles.
How long do sand tarts last?
Sand tarts can last up to 5 days if stored in an airtight container at room temperature. You can also freeze them for up to 3 months!
Can I make a large batch of sand tarts and freeze them for future use?
Yes, you certainly can! Simply bake your sand tarts, let them cool completely, and then store them in an airtight container in the freezer. To thaw, leave them at room temperature for a few hours before serving.