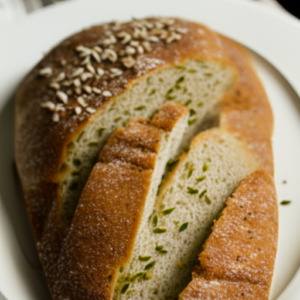
bread recipe
The Ultimate Guide to Making Delicious Bread from Scratch
Bread is considered as one of the oldest and most popular foods in the world. It has become an important part of our daily routine and every occasion, from breakfast to dinner, from sandwiches to Thanksgiving stuffing. But do you know that making bread from scratch is not only satisfying but also has numerous benefits?
So, whether you’re a beginner or an experienced baker looking for new tips and tricks, this ultimate guide will provide you with everything you need to know about making delicious bread from scratch.
Types of Bread
Before diving deep into the recipe, it’s important to understand that there are different types of bread available, each with its unique taste, texture, and ingredients.
- Sourdough bread: Made using wild yeast starters, and often has a tangy taste.
- White bread: Made with white flour, water, yeast, and salt.
- Whole wheat bread: Made with whole wheat flour which contains more nutrients than white flour.
- Rye bread: Made with rye flour which has a richer flavor than white flour.
The type of bread you choose depends on your preference, dietary requirements and recipe demand.
Equipment Needed
You don’t need fancy equipment to make great tasting bread. However, some supplies will make the process easier and more efficient.
- Mixing bowls: You will need two mixing bowls: one for the dry ingredients and one for the wet ones.
- Measuring cups and spoons: These are important to weigh and measure each ingredient accurately.
- Baking pans: Loaf pans, baking sheets, or Dutch ovens are useful for shaping your dough.
- Stand mixer: If you have one, it can save you a lot of time and effort when mixing and kneading your dough.
- Proofing baskets and bread scoring tools: Advanced bakers may want to invest in these, but they’re not necessary. Proofing baskets help form the bread’s shape while the scoring tool lets you create patterns on top of your bread.
Ingredients
The ingredients used to make bread from scratch are simple and easily available at any store. However, choosing the right ingredients can definitely enhance the taste of your bread.
- Flour: The main ingredient in bread-making is flour. You can use wheat flour, all-purpose flour or a combination of flours depending on the recipe.
- Yeast: Yeast helps the dough rise by releasing carbon dioxide gas. You can use either active dry yeast or instant yeast depending on your preference.
- Water: Water is essential for activating the yeast and creating gluten strands that produce a smooth texture.
- Salt: Enhances the flavor and smell of the bread. Without salt, the bread may taste bland and unappetizing.
- Sugar, eggs, milk: If you want to add sweetness or richness to your bread, you can add sugar, eggs or milk as an optional ingredient.
Baking Day Preparation
To have a successful bread-making day, it’s essential to plan ahead.
- Preparing the ingredients: Pre-measure and weigh out all the ingredients you will need for your recipe.
- Creating a schedule: Depending on the recipe, bread takes time to rise and bake. Plan your day accordingly.
- Checking equipment: Before starting the process, make sure that all equipment and utensils are clean and functional.
Mixing and Kneading
The mixing process involves combining dry and wet ingredients in a specific order to create dough. To create a smooth dough, knead the dough until it forms gluten strands that stretch without breaking.
- Mixing: Add flour, yeast, salt, and other ingredients as directed by the recipe to a large mixing bowl. Mix well.
- Kneading: Knead dough on a lightly floured surface for about ten minutes or use the stand mixer to mix and knead it. The goal is to have an elastic ball of dough that doesn’t stick to your hands.
- Resting: Cover the dough with a damp cloth and let it rest for about an hour for it to double in size.
Proofing and Rising
The process of letting the dough rest after kneading is called proofing. It allows yeast to produce carbon dioxide bubbles that create air pockets in the bread’s structure.
- Proofing time: Proofing time depends on room temperature, humidity, yeast type and flour used. Generally, the dough should double in size within 30 minutes to 2 hours.
- Testing for readiness: You can test if your dough has risen enough by lightly pressing on the surface. If it leaves a dent, the dough is ready for baking.
Shaping and Scoring
After proofing, your dough will need to be shaped and scored before baking.
- Shaping: Shaping dough depends on the type of bread you’re making; however, shaping should always involve gentle folding and tucking.
- Scoring: Use a sharp knife or bread scoring tool to cut into the loaf’s surface before baking. This allows controlled expansion of the crust as the bread rises in the oven.
Baking Techniques
The baking technique you choose will depend on what equipment you have available.
- Oven settings: Preheat your oven to the temperature recommended by your recipe. Place your bread in the oven and bake it for about 25-35 minutes or until a golden crust develops.
- Baking in Dutch Oven: Preheat your Dutch oven in the oven before adding your well-shaped round or boule-shaped loaf of bread. Then place it inside, closing the lid tightly for baking while maintaining consistent heat inside for moist, evenly cooked bread.
Troubleshooting Common Issues
Bread-making isn’t always easy; failure can cause frustration and discourage bakers from trying again. But don’t worry. We’ve got solutions to common baking issues.
- Dense bread: Dough may be too wet, or the yeast may not have enough time to rise. Adjust the flour and yeast ratios and proof the dough longer.
- Bread that doesn’t rise: Either your yeast is expired, the water was too hot for the yeast to activate or you didn’t give the dough enough time to rise.
- Burnt crust: Reduce baking temperature or remove excess sugar from the dough. Cover the bread with foil if it starts browning too quickly.
Serving Bread
Now that you’ve made your delicious bread, it’s time to serve it up!
- Pairing: Choose to pair with soup, cheese, or a glass of fine wine for an even greater experience.
- Storing: Wrap the bread in paper or cloth before refrigerating or freezing if you will not consume within two days, otherwise keep at room temperature in a bread box or bag.
Conclusion
Making bread from scratch can be an enjoyable and rewarding experience. Use this ultimate guide to help you along the way, and don’t be afraid to test out new recipes and techniques as you gain confidence in baking your delectable homemade bread.
7 FAQs About Bread Recipe
1. Why is bread baking so popular?
Bread is a staple in many diets around the world. Homemade bread can be cheaper, healthier, and tastier than store-bought bread. Baking your own bread is also a great way to spend some time with loved ones and de-stress.
2. What are the essential ingredients for bread making?
- Flour
- Water
- Yeast or sourdough starter
- Salt
You can add other ingredients such as sugar, milk, eggs, or butter to enhance the flavor of the bread.
3. Can I use all-purpose flour for bread making?
Yes, you can use all-purpose flour for baking bread. However, bread flour has a higher protein content than all-purpose flour, which makes it better for making bread. Bread flour provides more gluten development and helps the dough rise higher.
4. Should I use instant yeast or active dry yeast?
You can use both instant yeast and active dry yeast for baking bread. However, active dry yeast needs to be proofed in warm water before using it in the dough. Instant yeast doesn’t require proofing and can be added directly to the flour.
5. How long should I knead the dough for?
You should knead the dough for about 10-15 minutes by hand or 5-10 minutes with a stand mixer until it becomes smooth and elastic.
6. How long should I let the dough rise?
The rising time depends on the temperature of the environment and the dough. Generally, you should let the dough rise until it doubles in size, which can take anywhere from 1-2 hours.
7. Can I freeze bread dough?
Yes, you can freeze bread dough for later use. After kneading the dough, divide it into portions and wrap each portion tightly with plastic wrap or foil. When ready to use, thaw the dough in the refrigerator overnight and let it rise again before baking.