
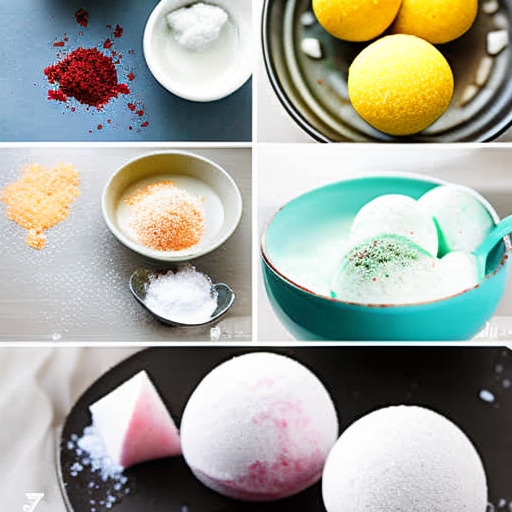
The Ultimate Guide to Making Your Own Bath Bombs at Home
Are you a fan of bath bombs but tired of spending money on store-bought ones? Why not make your own? Not only can you create customized scents and designs, but it’s also more cost-effective in the long run. Plus, making your own bath bombs allows you to control the ingredients and avoid any harmful chemicals found in some commercial brands.
In this ultimate guide, we’ll walk you through everything you need to know about making your own bath bombs at home. From choosing the right ingredients to troubleshooting common mistakes, you’ll be an expert in no time.
What Are Bath Bombs and Why Should You Use Them?
Bath bombs are small spheres or shapes that fizz and dissolve in bathwater. They are typically made with baking soda, citric acid, Epsom salt, and essential oils. Some brands may also include colorants or glitter for added visual flair.
Using a bath bomb is a great way to enhance your bathing experience. The fizzing effect of the bomb releases the essential oils and fragrance, which can provide aromatherapy benefits such as relaxation or stress relief. The Epsom salt helps soothe sore muscles and joints, while the baking soda can help soften skin.
Why Make Your Own Bath Bombs?
While there are plenty of store-bought options available, making your own bath bombs has several benefits. For one thing, it allows you to customize the scent and design to your liking. You can mix and match essential oils to create a personalized aroma blend or add natural colorants like beetroot powder for a unique hue.
Making your own bath bombs also ensures that you’re using quality ingredients without any hidden toxins or chemicals. Many commercial bath bombs contain fragrances or dyes that can cause skin irritation. By making them yourself, you can avoid those potentially harmful additives.
Not to mention, creating your own bath bombs can be a fun and relaxing DIY project. Plus, it’s a thoughtful gift idea that your friends and family will appreciate.
Ingredients You’ll Need
Before you get started on your bath bomb-making journey, you’ll need to gather some essential ingredients.
Dry Ingredients:
- 1 cup of baking soda
- 1/2 cup of Epsom salt
- 1/2 cup of corn starch
- 1/2 cup of citric acid
Wet Ingredients:
- 2-3 tsp. of essential oil (lavender, peppermint, eucalyptus, etc.)
- A few drops of natural food coloring or mica powder (optional)
- A few spritzes of witch hazel or water in a spray bottle (to moisten the mixture)
Molds: You can use silicone molds in various shapes and sizes. Some popular ones include spheres, hearts, flowers, and stars.
Tips on Purchasing Ingredients
You can find all the ingredients for making bath bombs at many local craft stores or online retailers such as Amazon. Be sure to check if the citric acid is labeled as “food grade,” as some types are intended for cleaning purposes only.
Additionally, invest in quality essential oils from reputable brands. Look for pure essential oils without any synthetic fragrances or fillers.
Getting Started: Choosing the Right Recipe and Equipment
Choosing the right recipe for your bath bombs is crucial to ensure they come out effortlessly and correctly. While there are countless variations available online, here is a simple yet effective recipe:
Basic Bath Bomb Recipe:
- Mix all the dry ingredients (baking soda, citric acid, Epsom salt, and corn starch) in a large mixing bowl.
- In a separate small bowl, add drops of essential oil and food coloring (if desired) to the witch hazel or water. Mix and set aside.
- Spray the witch hazel mixture onto the dry ingredients. Using your hands, mix thoroughly until the mixture clumps together. Be careful not to over-saturate it; otherwise, the mixture won’t hold its shape.
- Scoop a bit of the mixture into the molds, pressing firmly with your fingers. Repeat until all molds are filled. Let sit for 24 hours before removing from molds.
Equipment Needed
- A large mixing bowl
- A small bowl or spray bottle
- A whisk or fork for combining dry ingredients
- Gloves to protect your skin from the citric acid (optional)
- Airtight containers for storage
Safety Measures to Take
When working with citric acid, it’s important to take certain safety precautions. Avoid inhaling it as it can irritate your respiratory system. Consider wearing gloves to protect your skin from irritation and wash your hands thoroughly after handling it.
Creating Different Shapes and Designs
Using different molds allows you to experiment with unique shapes, sizes, and designs for your bath bombs.
If you’re looking to make layered or patterned designs, here are some tips:
- Add different colors of dye or mica powder to separate bowls of dry ingredients before adding wet ingredients.
- Use more than one mold to create layered patterns. Layer each mixture in different molds, then gently press the two halves together.
- Add embeds like dried flowers, rose petals, or herbs to the center of the mold before filling it with the bath bomb mixture.
Popular Mold Shapes and Styles
Some popular mold shapes include:
- Spheres (around 2.5-3 inches in diameter)
- Hearts
- Flowers
- Stars
- Cupcakes
Adding Natural Elements to Your Bath Bombs
Adding natural elements like dried herbs or flowers can enhance the scent and visual appeal of your bath bombs.
Natural Colorants and Scents
Here are some natural ingredients you can incorporate into your bath bombs:
- Beetroot powder (for pink/red hues)
- Turmeric (for yellow tones)
- Spirulina (for green shades)
- Dried lavender buds or chamomile flowers (for added aromatherapy benefits)
Safe Ways to Use Essential Oils
Essential oils are a popular addition to bath bombs because of their aromatic properties. However, they must be used safely to avoid skin irritation. Here are some tips:
- Mix them with a carrier oil like coconut oil instead of adding them directly to the dry mix.
- Dilute them first by mixing 5-10 drops of essential oil with 1/2 cup of baking soda before adding it to the rest of the mix.
- Avoid using oils like cinnamon or clove, which can be irritating to sensitive skin.
- Always research individual essential oils to determine any potential side effects.
Customizing Your Bath Bombs
The possibilities for customizing your bath bombs are endless. Here are a few additional ideas:
Creating Custom Scent Blends
Mix and match essential oils to create a unique scent combination that’s perfect for you. Some popular blends include lavender and vanilla, peppermint and eucalyptus, or grapefruit and bergamot.
Adding Extra Moisturizing Ingredients
For added moisturizing benefits, consider adding ingredients like shea butter, coconut oil, or honey.
Making Vegan or Gluten-Free Bath Bombs
You can easily modify the recipe to make vegan or gluten-free bath bombs. Simply replace corn starch with arrowroot powder for a gluten-free option or use coconut oil instead of shea butter for a vegan alternative.
Storing Your Bath Bombs
Proper storage is key to ensuring your bath bombs last as long as possible. Store them in an airtight container away from moisture and heat. They should last up to six months if stored properly.
Tips on Packaging Your Bath Bombs as Gifts
If you’re giving your bath bombs as gifts, consider packaging them creatively in small muslin bags or glass jars tied with ribbon. Add a personalized label or tag with the recipe and scent name.
Advanced Techniques and Recipes
Once you’ve mastered basic bath bomb-making, try some more advanced techniques and recipes:
- Fizzing shower steamers instead of bath bombs
- Using alcohol sprays to add a marble effect to your bath bombs
- Advanced recipes using cocoa butter, beeswax, or citric acid substitutions.
Frequently Asked Questions
Can I Mix Different Recipes Together?
Yes! Experimenting with different recipes can help you find the perfect combination of scent and texture. Just be sure to measure carefully and modify the wet ingredients to ensure the mixture isn’t too saturated.
Will Bath Bombs Stain My Bathtub?
Most commercial bath bombs shouldn’t stain your bathtub as long as they’re properly diluted. However, DIY bath bombs with high levels of dye or colorants can potentially leave a residue. To avoid this, either reduce the amount of colorant used or rinse your bathtub after use.
What Should I Do If My Bath Bomb Doesn’t Fizz?
If your bath bomb isn’t fizzing, it’s likely because the mixture is too dry or too wet. If it’s too dry, add more drops of witch hazel or water to moisten it. If it’s too wet, add more baking soda and Epsom salt.
Tips for Hosting a DIY Bath Bomb Party
Hosting a DIY bath bomb party is a unique and fun activity that your friends will love. Here are some tips:
- Provide plenty of molds, ingredients, and mixing bowls for everyone.
- Have several basic recipes printed out for guests to follow.
- Incorporate fun add-ons like glitter, dried flowers, or embeds.
- Display finished bath bombs in glass jars to showcase everyone’s creations.
Conclusion
Making your own bath bombs can be an enjoyable and relaxing activity that pays off in the end. By understanding the proper ingredients and techniques involved, you can create personalized bath bombs that are high-quality and free from potentially harmful additives. Whether you’re someone who loves taking luxurious baths or are in search of unique gift ideas, making your own bath bombs is truly a rewarding experience.
FAQs about Bath Bomb Recipe
1. What ingredients do I need to make bath bombs?
To make bath bombs, you will need the following ingredients:
- Baking soda
- Citric acid
- Epsom salt
- Cornstarch
- Essential oils or fragrances
- Liquid colorant or food coloring (optional)
- Coconut oil or other carrier oils (optional)
Make sure to measure the ingredients accurately as each plays a crucial role in creating the right texture and fizz.
2. Can I use any essential oil for my bath bomb recipe?
Most essential oils can be used for bath bombs, but it’s best to stay away from the ones that can irritate the skin. Some safe options you can choose from are lavender, chamomile, peppermint, eucalyptus, and citrus oils.
3. How do I achieve different colors on my bath bombs?
You can add liquid colorant or food coloring to your bath bomb mixture to achieve different colors. However, be mindful of the amount you add as too much liquid can activate the baking soda and cause your mixture to start fizzing prematurely.
4. How do I store and package my bath bombs?
You can store your finished bath bombs in an airtight container away from direct sunlight and moisture. For packaging, you can wrap them in tissue paper or place them in a decorative box with crinkle paper.